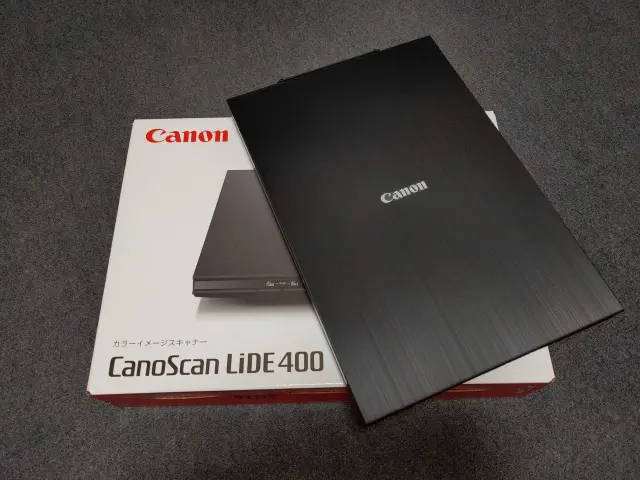
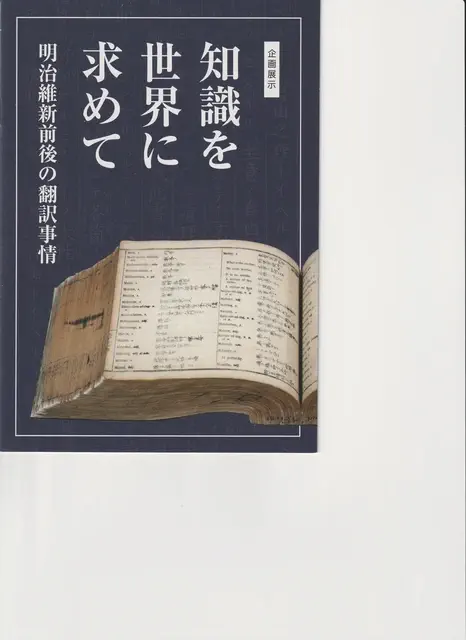
最近スキャナを買ったので、使うために色々調べた事をまとめる。
以前から健康診断の結果とか年金の通知書だったり、薬の説明書だったり、 物理的な紙で手に入るものを整理する目的でスキャナ欲しいなとは思っていたのだが 「そこまで頻繁に使うわけじゃないんだよな」とか「置く場所どうしようかな」と思って結局購入には至っていなかった。
ただ少し前に仕事を辞めて、その際に会社と紙で色々やりとりしたり、 給料天引きで払っていた保険料とかを自分で支払う様になってその払込用紙だったり、 物理的な紙を扱う場面が結構増えた。 特に払込用紙は、払うタイミングで保管している紙用ファイルをひっくり返すことになり結構面倒になっていた。
で、先日 Amazon のブラックフライデーでちょうど良い機会かもなということで、思い切って買った。
Canon CanoScan LiDE 400 について

今回買ったスキャナーについて。
詳細は 公式サイトのスペック表 見るのが良いが、 ざっくりとは USB バスパワーで動く最大 A4 サイズ対応のフラットベッドタイプのスキャナ、値段は自分が購入した時で 9,000円 くらい。
選定の理由についてだが、 使用用途や頻度を考えるとシートフィードタイプやオーバーヘッドタイプ、プリンタ複合機は大きさ的にも値段的にも大げさだろうというので除外、 ハンディタイプはスキャン時紙を呑ませるのに気を使いそうというのと持ち運ぶ事も無いだろうというので除外、 ってことでフラットベッドタイプのエントリーモデルにした。
対抗として EPSON の GT-S660 があったが、後述の SANE でサポートしてなかったので今回の Canon のヤツのにした。 EPSON から Linux 用のドライバが提供されてる 1 のでそれを別途インストールすれば使える様ではあったが、 自分でスキャナ買うのが初めてというのもあってなるべく余計な要素を増やしたくなかった。 (それ以外でどっちが良いみたいな理由も特段無かったし)
SANE について
Scanner Access Now Easy の頭文字を取って SANE 。公式サイトは以下。
SANE - Scanner Access Now Easy
いろんなメーカーから出ているスキャナデバイスへの標準化されたアクセス手段を提供するものになる。 名前の通りスキャナで使うことが多いとは思うが、一応 Webカメラ等も扱える。(画像入力を行えるハードウェア全般?) サポートしている具体的なデバイス一覧も公式サイト 2 で確認できる。
scanimage というコマンドが同梱されていて、今回はコレを使ってスキャンをする。
GUI も色々作られており 3 その中の適当なヤツを使うというのも考えたが、
- 何やってるか理解もしやすいだろうし一旦そのままで使ってみるか
- CLI から使えるようになっておいた方が今後応用も効くだろう
ということで同梱のコマンドを使うことにした。
インストールに関しては、Archlinux の場合 extra リポジトリにパッケージがある。
❯ pacman -Si sane
リポジトリ             : extra
名前                   : sane
バージョン             : 1.2.1-5
説明                   : Scanner Access Now Easy
アーキテクチャ         : x86_64
URL                    : http://www.sane-project.org/
ライセンス             : GPL2
グループ               : なし
提供                   : libsane.so=1-64
依存パッケージ         : bash  cairo  gcc-libs  glibc  libpng  libieee1284  net-snmp  v4l-utils  avahi  libavahi-client.so=3-64  libavahi-common.so=3-64  curl  libcurl.so=4-64  glib2  libgobject-2.0.so=0-64  libgphoto2  libgphoto2.so=6-64
                         libgphoto2_port.so=12-64  libjpeg-turbo  libjpeg.so=8-64  libtiff  libtiff.so=6-64  libusb  libusb-1.0.so=0-64  libxml2  libxml2.so=2-64  poppler-glib  libpoppler-glib.so=8-64  systemd-libs  libsystemd.so=0-64
提案パッケージ         : sane-airscan: for scanners working in driverless mode
衝突パッケージ         : なし
置換パッケージ         : なし
ダウンロード容量       : 3.70 MiB
インストール容量       : 18.29 MiB
パッケージ作成者       : David Runge <[email protected]>
ビルド日時             : 2023年09月02日 22時23分18秒
検証方法               : MD5 Sum  SHA-256 Sum  署名
使ってみる
スキャナの認識
sane のパッケージに udev の設定ファイルが同梱されており、パッケージをインストールして USB で繋げば認識してくれる。
❯ pacman -Ql sane | grep udev
sane /usr/lib/udev/
sane /usr/lib/udev/hwdb.d/
sane /usr/lib/udev/hwdb.d/20-sane.hwdb
sane /usr/lib/udev/rules.d/
sane /usr/lib/udev/rules.d/65-sane.rules
sane /usr/lib/udev/rules.d/66-saned.rules

❯ lsusb -d 04a9:1912
Bus 004 Device 002: ID 04a9:1912 Canon, Inc. LiDE 400
また、認識されていれば SANE での実際のスキャンに使う scanimage コマンドでも確認できる。
❯ scanimage --list-devices
device `v4l:/dev/video0' is a Noname HD Pro Webcam C920 virtual device
device `pixma:04A91912_4BB738' is a CANON CanoScan LiDE 400 multi-function peripheral
2行あるが下の pixma:04A91912_4BB738 が今回買ったスキャナになる。
上のやつはロジクールのウェブカメラで、前段で少し触れたように SANE ではこういったものも扱える。
スキャンの実行
デバイスを認識できたので、実際にスキャンしてみる。
コマンドの使い方は普通に scanimage --help もしくは man scanimage で確認できる。
またこのコマンドは物理デバイスを操作するためのコマンドになるが、
デバイス固有のオプションを指定することもでき、
具体的にどういったオプションが使えるかは --device <デバイス> を追加すれば基本オプションと一緒に確認できる。
今回の LiDE 400 の場合はこんな感じのオプションが使える。
❯ scanimage --device "pixma:04A91912_4BB738" --help
Usage: scanimage [OPTION]...

Start image acquisition on a scanner device and write image data to
standard output.

Parameters are separated by a blank from single-character options (e.g.
-d epson) and by a "=" from multi-character options (e.g. --device-name=epson).
-d, --device-name=DEVICE   use a given scanner device (e.g. hp:/dev/scanner)
    --format=pnm|tiff|png|jpeg|pdf  file format of output file
-i, --icc-profile=PROFILE  include this ICC profile into TIFF file
-L, --list-devices         show available scanner devices
-f, --formatted-device-list=FORMAT similar to -L, but the FORMAT of the output
                           can be specified: %d (device name), %v (vendor),
                           %m (model), %t (type), %i (index number), and
                           %n (newline)
-b, --batch[=FORMAT]       working in batch mode, FORMAT is `out%d.pnm' `out%d.tif'
                           `out%d.png' or `out%d.jpg' by default depending on --format
                           This option is incompatible with --output-file.    --batch-start=#        page number to start naming files with
    --batch-count=#        how many pages to scan in batch mode
    --batch-increment=#    increase page number in filename by #
    --batch-double         increment page number by two, same as
                           --batch-increment=2
    --batch-print          print image filenames to stdout
    --batch-prompt         ask for pressing a key before scanning a page
    --accept-md5-only      only accept authorization requests using md5
-p, --progress             print progress messages
-o, --output-file=PATH     save output to the given file instead of stdout.
                           This option is incompatible with --batch.
-n, --dont-scan            only set options, don't actually scan
-T, --test                 test backend thoroughly
-A, --all-options          list all available backend options
-h, --help                 display this help message and exit
-v, --verbose              give even more status messages
-B, --buffer-size=#        change input buffer size (in kB, default 32)
-V, --version              print version information
Output format is not set, using pnm as a default.

Options specific to device `pixma:04A91912_4BB738':
    --resolution auto||75|150|300|600|1200|2400|4800dpi [75]
        Sets the resolution of the scanned image.
    --mode auto|Color|Gray|48 bits color|16 bits gray|Lineart [Color]
        Selects the scan mode (e.g., lineart, monochrome, or color).
    --source Flatbed [Flatbed]
        Selects the scan source (such as a document-feeder). Set source before
        mode and resolution. Resets mode and resolution to auto values.
    --button-controlled[=(yes|no)] [no]
        When enabled, scan process will not start immediately. To proceed,
        press "SCAN" button (for MP150) or "COLOR" button (for other models).
        To cancel, press "GRAY" button.
    --custom-gamma[=(auto|yes|no)] [no]
        Determines whether a builtin or a custom gamma-table should be used.
    --gamma-table auto|0..65535,... [inactive]
        Gamma-correction table with 1024 entries. In color mode this option
        equally affects the red, green, and blue channels simultaneously (i.e.,
        it is an intensity gamma table).
    --gamma auto|0.299988..5 [2.2]
        Changes intensity of midtones
    -l auto|0..216.069mm [0]
        Top-left x position of scan area.
    -t auto|0..297.011mm [0]
        Top-left y position of scan area.
    -x auto|0..216.069mm [216.069]
        Width of scan-area.
    -y auto|0..297.011mm [297.011]
        Height of scan-area.
    --button-update [advanced]
        Update button state
    --threshold auto|0..100% (in steps of 1) [inactive]
        Select minimum-brightness to get a white point
    --threshold-curve auto|0..127 (in steps of 1) [inactive]
        Dynamic threshold curve, from light to dark, normally 50-65
    --adf-wait auto|0..3600 (in steps of 1) [inactive]
        When set, the scanner waits up to the specified time in seconds for a
        new document inserted into the automatic document feeder.
    --calibrate auto|Once|Always|Never [Once]
        When to perform scanner calibration. If you choose "Once" it will be
        performed a single time per driver init for single page scans, and for
        the first page for each ADF scan.

Type ``scanimage --help -d DEVICE'' to get list of all options for DEVICE.

List of available devices:
    v4l:/dev/video0 pixma:04A91912
各オプションの [ ] で囲まれている値がデフォルトになるので、
不満があれば実行時に適宜指定する。
とりあえず以下のような感じで一回スキャンしてみる。
❯ scanimage --device "pixma:04A91912_4BB738" --format=jpeg --output-file out.jpeg --progress
Progress: 100.0%
❯ ls -lh out.jpeg
-rw-r--r-- 1 shida shida 51K 12月 27 12:55 out.jpeg
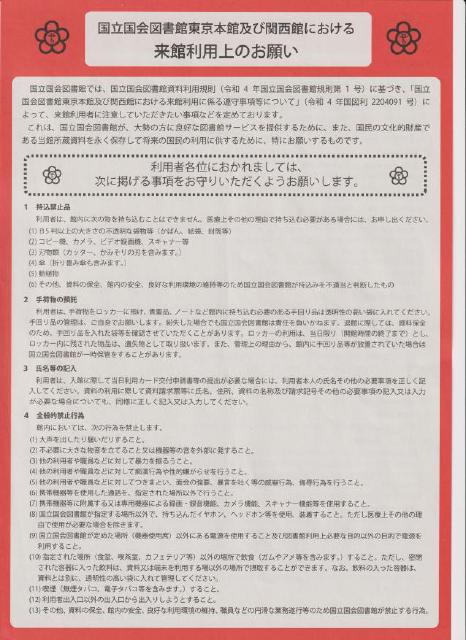
実際に出力された画像はコレ

ちなみに Exif 情報としては最低限という感じで、特に面白い何かはなかった。
❯ exiftool example.jpeg
ExifTool Version Number         : 12.70
File Name                       : example.jpeg
Directory                       : .
File Size                       : 109 kB
File Modification Date/Time     : 2023:12:27 15:15:52+09:00
File Access Date/Time           : 2023:12:27 15:15:52+09:00
File Inode Change Date/Time     : 2023:12:27 15:15:52+09:00
File Permissions                : -rw-r--r--
File Type                       : JPEG
File Type Extension             : jpg
MIME Type                       : image/jpeg
JFIF Version                    : 1.01
Resolution Unit                 : inches
X Resolution                    : 75
Y Resolution                    : 75
Image Width                     : 638
Image Height                    : 877
Encoding Process                : Baseline DCT, Huffman coding
Bits Per Sample                 : 8
Color Components                : 3
Y Cb Cr Sub Sampling            : YCbCr4:2:0 (2 2)
Image Size                      : 638x877
Megapixels                      : 0.560
解像度の設定
ほぼオプション指定無しでスキャンした画像については前段で貼った画像の通りになる。
A4 であの文字サイズでも一応読めなくは無いが、個人的にはもう少し解像度が欲しくなったのでその辺りの指定を追加する。
解像度の選択肢は前述した scanimage コマンドのデバイス固有のオプションとして確認できる。
今回使っている LiDE 400 の場合は以下。
❯ scanimage --device "pixma:04A91912_4BB738" --help
Usage: scanimage [OPTION]...

〜略〜

Options specific to device `pixma:04A91912_4BB738':
    --resolution auto||75|150|300|600|1200|2400|4800dpi [75]
        Sets the resolution of the scanned image.
この通りデフォルトだと 75dpi でスキャンされるが、先の画像の通りもう少し解像度が欲しい。 ただ、解像度が上がれば当然ファイルサイズは大きくなりスキャン時間も長くなるので、 その辺りの妥協点を探る意味で各 dpi それぞれでスキャンしてみた。 ファイル形式については jpeg を使った。
参考までに実際に試したコマンド(折りたたみ)
スキャンが1回終わった後、ヘッドが所定位置に戻るのに数秒かかるので10秒程度インターバルを取っている。 (動作音聞いてた感じもう少し時間とっても良かったかも)
❯ for res in auto 75 150 300 600 1200 2400 4800 ; do\
∙   echo "# resolution: $res" ;\
∙   sleep 10;\
∙   time scanimage --device "pixma:04A91912_4BB738" --format=jpeg --output-file resolution-test-$res.jpeg --resolution $res --progress ;\
∙ done
# resolution: auto
Progress: 100.0%
real    0m12.881s
user    0m0.100s
sys     0m0.189s
# resolution: 75
Progress: 100.0%
real    0m13.992s
user    0m0.123s
sys     0m0.194s
# resolution: 150
Progress: 100.0%
real    0m13.999s
user    0m0.147s
sys     0m0.219s
# resolution: 300
Progress: 100.0%
real    0m13.959s
user    0m0.147s
sys     0m0.259s
# resolution: 600
Progress: 100.0%
real    0m33.990s
user    0m0.480s
sys     0m0.579s
# resolution: 1200
Progress: 100.0%
real    2m4.804s
user    0m1.962s
sys     0m2.083s
# resolution: 2400
Progress: 100.0%
real    9m27.580s
user    0m7.799s
sys     0m8.734s
# resolution: 4800
Progress: 100.0%
real    40m25.743s
user    0m32.430s
sys     0m36.252s

❯ ls -lhtr
合計 206M
-rw-r--r-- 1 shida shida 108K 12月 27 15:47 resolution-test-auto.jpeg
-rw-r--r-- 1 shida shida 108K 12月 27 15:48 resolution-test-75.jpeg
-rw-r--r-- 1 shida shida 348K 12月 27 15:48 resolution-test-150.jpeg
-rw-r--r-- 1 shida shida 1.2M 12月 27 15:49 resolution-test-300.jpeg
-rw-r--r-- 1 shida shida 4.4M 12月 27 15:49 resolution-test-600.jpeg
-rw-r--r-- 1 shida shida  16M 12月 27 15:52 resolution-test-1200.jpeg
-rw-r--r-- 1 shida shida  49M 12月 27 16:01 resolution-test-2400.jpeg
-rw-r--r-- 1 shida shida 136M 12月 27 16:42 resolution-test-4800.jpeg
各 dpi でスキャンした際のファイルサイズとかかった時間をまとめたのが以下。
| –resolusion | ファイルサイズ | スキャン時間 |
|---|---|---|
| auto | 108 KB | 13秒 |
| 75 | 108 KB | 14秒 |
| 150 | 348 KB | 14秒 |
| 300 | 1.2 MB | 14秒 |
| 600 | 4.4 MB | 34秒 |
| 1200 | 15 MB | 2分5秒 |
| 2400 | 49 MB | 9分28秒 |
| 4800 | 136 MB | 40分26秒 |
300dpi 以下でスキャン時間がほぼ同じになった 4 ことを除けば、どちらも概ね解像度に比例して増える感じだった。 画像サイズに関しては、実際スキャンするのは多くても年間100枚かそこらだろうということで 1200dpi の 2GB/年 くらいなら許容範囲かなという感覚。 スキャンにかかる時間に関しては数枚まとめてやることが多いだろうという事を考えると、できればこのスキャナで最短になる 300dpi までの 15秒 、長くても 600dpi での 30秒 くらいじゃないとストレスかもなぁという感じ。
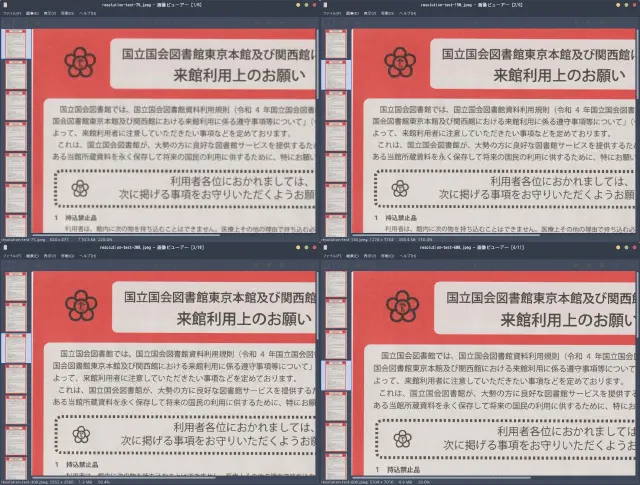
画質については良い感じの比較方法が思いつかなかったのだが、画像ビューアで大体同じ領域を表示するように拡大して見たヤツを並べてみることにした。 1200dpi 以上に関してはスキャンにかかる時間の都合上多分使わないだろうというのと、 auto は実質 75dpi って事のようだったので省略。

--resolution を値を大きくすると確かに画質は良くなるが、個人的な感想としては以下。
- 75dpi : 読めるがガビガビなのでもう少し解像度欲しい
- 150dpi : 問題なく読める、拡大してよく見ると若干ぼやけてるかなくらい
- 300dpi : 違和感無く読める、普通に読む程度に拡大しても気にならない
- 600dpi : 違和感無く読める、画質を比較するつもりでガッツリ拡大して見比べないと 300dpi との違いはよくわからない 5
150dpi か 300dpi のどっちかという感じだが、 どっちにしても今回使っているスキャナだとスキャンにかかる時間は変わらなくて、 ファイルサイズ的にも許容範囲内なので 300dpi で取っていけばいいかなとなった。 6
トリミング
今回買ったスキャナの場合スキャンサイズのオプションが未指定だと常にスキャナの最大サイズでスキャンされる。 前述したような A4 サイズならまだそこまで気にならないが、スキャン対象がそれより小さい B5 サイズや A5 サイズ、はがきサイズだったりすると結構な余白ができる。

自分の用途的にこのままでも致命的に困るわけでは無いが、無駄ではあるのでトリミングをすることにした。
ということで最初に目を付けたのは、 scanimage コマンドのデバイス固有のオプションになる。
LiDE 400 のデバイス固有のオプションでは以下のようにスキャンエリアを指定するオプションがあり、 auto が指定できる様に見える。
❯ scanimage --device "pixma:04A91912_4BB738" --help

〜略〜

Options specific to device `pixma:04A91912_4BB738':

〜略〜

    -l auto|0..216.069mm [0]
        Top-left x position of scan area.
    -t auto|0..297.011mm [0]
        Top-left y position of scan area.
    -x auto|0..216.069mm [216.069]
        Width of scan-area.
    -y auto|0..297.011mm [297.011]
        Height of scan-area.
コレで良いじゃんと思ったのだが、実際に指定してみると bad option value でスキャンできなかった。
❯ scanimage --device "pixma:04A91912_4BB738" --format=jpeg -l 0 -t 0 -x auto -y auto --output-file file.jpeg --resolution 300 --progress
scanimage: option --x: bad option value (rest of option: auto)
自分が何かを勘違いしているのかと思い、指定の仕方を色々変えてはみたのだがどうにもできなかった。 man の方を見てみると以下のように出てきたので実際使えない値なのかも知れない。
❯ PAGER=cat man scanimage

〜略〜
       -l 0..218mm [0]
              Top-left x position of scan area.

              The  description above shows that option -l expects an option value in the range from 0 to 218 mm.  The value in square
              brackets indicates that the current option value is 0 mm. Most backends provide similar geometry options for top-left y
              position (-t), width (-x) and height of scan-area (-y).
〜略〜
ということで、スキャン時の書類サイズの自動認識は諦めた。
次にスキャンした画像を Imagemagick にかけてトリミングすることを考えたが、これもうまくいかなかった。
- スキャン面とカバーの白いヤツのズレで周辺や角が若干暗くなる事
- Imagemagick の
--trimオプションでの余白除去は角のピクセルの色を基準に行っているらしい
- Imagemagick の
- 物理スキャンなので余白の色が一定ではない事
この当たりが理由だとは思うのだが、
- スキャン時に紙を角に合わせず中央寄りに置いてスキャンして、4辺を数ミリずつトリミング
--fuzzオプションを使っての遊びの調整
等も試してはみたが上手くいかなかった。
最終的には、泥臭くはあるがラッパースクリプトを書いてスキャン時にサイズを指定することにした。 自動でトリミングするようにして、紙の置き方で毎回微妙にサイズが変わるよりかは良いかと思ったのもある。 7
書いたスクリプトは以下。
#!/bin/bash

set -eu

show_help() {
    cat <<EOF
Usage: $0 [OPTIONS]

This script is a wrapper for the scanimage command at Canon CanoScan LiDE 400.

Options:
  --device, -d DEVICE     Set the scan device. [Required]
  --output-file FILE      Set the output file name. [Required]
  --format FORMAT         Set the output format (pnm, tiff, png, jpeg, pdf). [jpeg]
  --resolution DPI        Set the scan resolution in dots per inch (auto, 75, 150, 300, 600, 1200, 2400, 4800). [300]
  --size, -s SIZE         Set the scan size (a4, a5, b5, hagaki, hagaki2). [a4]
  --progress              Show progress during the scan.
  --list-devices, -L      List available scan devices.
  --help                  Show this help message.

Example:
  $0 --device 'your_device_name' --output-file output.jpeg --resolution 300 --size a4 --progress
EOF
}

list_devices() {
    echo "Available scan devices:"
    scanimage -L
}

if ! command -v scanimage > /dev/null; then
    echo "Error: scanimage command not found. Please install SANE."
    exit 1
fi

# default
device=""
output_file=""
format="jpeg"
resolution="300"
size="a4"
progress=""

# parse options
while [[ "$#" -gt 0 ]]; do
    case $1 in
        --device|-d)
            device="$2";
            shift ;;
        --output-file)
            output_file="$2";
            shift ;;
        --format)
            case $2 in
                pnm|tiff|png|jpeg|pdf) format="$2" ;;
                *) echo "Error: Unsupported format. Supported formats are: pnm, tiff, png, jpeg, pdf."; exit 1 ;;
            esac
            shift
            ;;
        --resolution)
            case $2 in
                auto|75|150|300|600|1200|2400|4800) resolution="$2" ;;
                *) echo "Error: Unsupported DPI. Supported DPI values are: auto, 75, 150, 300, 600, 1200, 2400, 4800."; exit 1 ;;
            esac
            shift ;;
        --size|-s)
            case $2 in
                a4) size="210x297" ;;
                a5) size="148x210" ;;
                b5) size="182x257" ;;
                hagaki) size="100x148" ;;
                hagaki2) size="200x148" ;;
                *) echo "Error: Unsupported size. Supported sizes are: a4, a5, b5, hagaki, hagaki2."; exit 1 ;;
            esac
            shift
            ;;
        --progress)
            progress="--progress" ;;
        --list-devices|-L)
            list_devices;
            exit 0 ;;
        --help)
            show_help;
            exit 0 ;;
        *)
            echo "Unknown option: $1";
            exit 1 ;;
    esac
    shift
done

if [ -z "$device" ]; then
    echo "Error: --device option is required."
    exit 1
fi

if [ -z "$output_file" ]; then
    echo "Error: --device option is required."
    exit 1
fi

if [ -e "$output_file" ]; then
    echo "Error: Output file '$output_file' already exists."
    exit 1
fi


# build command
scanimage_cmd="scanimage"

if [ -n "$device" ]; then
    scanimage_cmd="$scanimage_cmd --device $device"
fi

if [ -n "$output_file" ]; then
    scanimage_cmd="$scanimage_cmd --output-file $output_file"
fi

if [ -n "$format" ]; then
    scanimage_cmd="$scanimage_cmd --format $format"
fi

if [ -n "$resolution" ]; then
    scanimage_cmd="$scanimage_cmd --resolution $resolution"
fi

if [ -n "$size" ]; then
    x=$(echo $size | cut -d'x' -f1)
    y=$(echo $size | cut -d'x' -f2)
    scanimage_cmd="$scanimage_cmd -l 0 -t 0 -x $x -y $y"
fi

scanimage_cmd="$scanimage_cmd $progress"


echo "Running: $scanimage_cmd"
eval $scanimage_cmd
実行はこんな感じ。
❯ ./scan-lide400 -d pixma:04A91912_4BB738 --output-file script-test.jpeg --size a5 --progress
Running: scanimage --device pixma:04A91912_4BB738 --output-file script-test.jpeg --format jpeg --resolution 300 -l 0 -t 0 -x 148 -y 210 --progress
Progress: 100.0%
スキャンサイズのパターンは足りなければ適宜追加していくつもり。
おわりに
という感じで、ひとまずスキャンする準備ができたので家にあるヤツを突っ込んでいく予定。
スキャン対象のサイズを自動で認識して良い感じにトリミングするという部分について、 今回は諦めたがやりようはあるとは思っているので気が向いたら再チャレンジしたい。
また今回はスキャナに紙をセットして、Linux マシンから scanimage コマンドを発行することでスキャンしているが、
scanbd というヤツを使ってスキャナについている物理ボタンの動作を上書きしてスキャンを実行することもできるみたいなので、この辺りもやってみたくはある。
ただ今のサイズ決め打ちでスキャンするやり方だとだと物理ボタンの数が足りないので、前述の良い感じにサイズ認識してトリミングするってのが先ではある。
今回買ったスキャナはエントリーモデルというのもあり画質はそこまで期待してなかったのだが、 スキャン時の解像度を上げてやればちゃんとキレイにスキャンできた(思ってたより数段キレイだった)ので驚いた。 思い返すと、スキャナの売り文句としては画質云々よりも読み取り速度とか補正機能の様な付加価値をアピールされていることが多い気がするので、 単純な画質に関しては上も下もさして変わらないのかもしれない。